Links: annotating with text, video, actions, color and time range
You can annotate the video by adding data to the links. The types of data you can annotate with are: a label, text comments, video comments, a selection of a time range of the video, color and actions.


2. Select a portion of the video.
(see the VIdeo Player Controls for an explanation of how to make a selection.)
The selection is indicated by the orange line in the movie controller well with selection handles at the start and end.
The Add Selection button turns orange with the selection for a link is changed.
3. Click the Add Selection button to save the selection.
Remove selection of target video

1. Click the Remove Selection button.
NOTE: There will not be a dialog asking to confirm the deletion of a selection. The selection will be deleted immediately and you can't undo this action.
Add text comments

1. Add Label
click in label field
start typing label
2. Add Comment
click in Comment field
start typing label
Keyboard
The Tab key will jump from field to field.
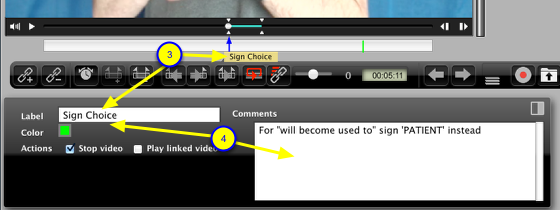
3. The text in the label field will pop up when you mouse over the link.
4. The text in the comments field and label will appear when the link is selected.
Recording a linked video

You can record a video to be associated with a link. To do that:
1. Check that the camera indicator light is green to ensure the Camera is on.
(for instructions on turning on the camera see Setting up VideoLinkwell recording.)


3. The record indicator displayed to the right of the Record Start button to let you know that you are recording.
When you have finished your recording:
4. Click Record Stop button.
Select existing video as linked video

You can also select an existing movie to be associated with the link.
1. Select the link you want the video added to by clicking on it.
2. Click the Import Linked video button.
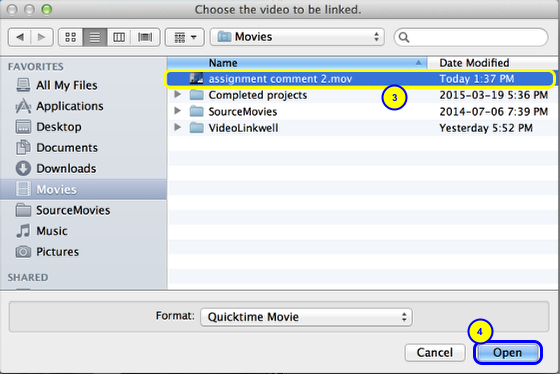
3. Select the movie that you want to associate with the link.
You can open either Quicktime movies or MPEG 4 movies. See the section Enable selection of MPEG 4 movies for more information.
4. Click the Open button.
If you select a video from the 'videobin' folder of the project folder you are working on it will move it into the main project folder.
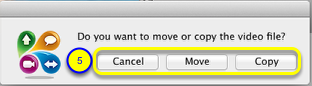
5. Select how you want to put the video into the project folder
- Move will move the video file from its original location to the project folder.
- Copy will leave the video file in its original location and make a copy in the project folder.
- Cancel will cancel the adding of the existing video to the link
Delete Linked video

To remove a video from a selected link:
1. Click the Remove Linked Video button.
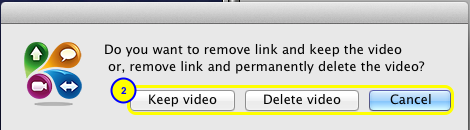
2. Choose whether you want to keep the video, or permanantly delete the video;
- If you click Keep video the video it will be stored in a folder called 'videobin' in the project's folder,
- If you click Delete video it is not stored in trash, it is permanently deleted.
- If you click Cancel the video will not be removed from the link nor deleted.
Show linked video
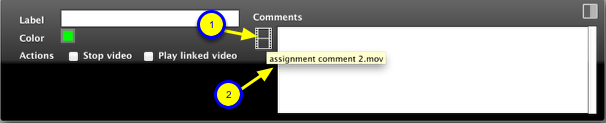
1. If a link has a video then the Show linked video button is visible.
- If the linked video window is not visible you can click on this button to show it.
2. When the mouse is hovering over the button it will show the file name of the linked video in a tooltip.
Change link color
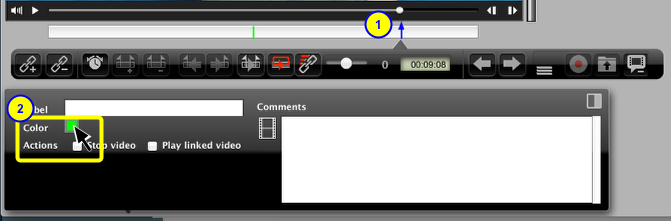
To change the color of a link:
1. Select the link by clicking on it.
2. Click on the Color button.
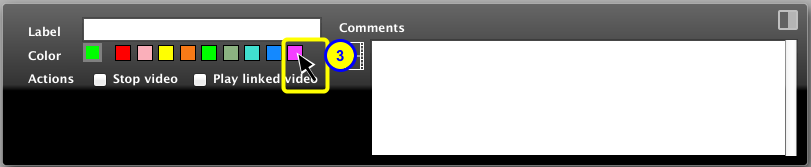
3. Select the new color for the link.

4. Now the link will have the new color.
Link actions
Link actions are performed while playing the main target movie. If link actions are enabled the actions you select for the link will occur.
There are two link actions that are explained below.
Stop video on link
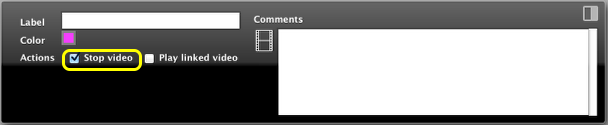
If Stop Video is checked the main movie will stop playing when it hits the link's time point.
NOTE: for this to take effect the Activate Links button in the video controls must be enabled. See the Video Player controls lesson for more info.
Play linked video
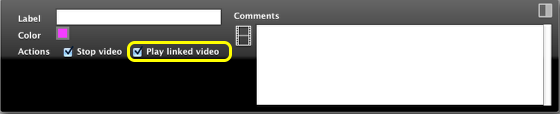
If Play linked video is checked the linked video will start playing when link is selected or when main movie hits the link time.
NOTE: for this to take effect the Activate Links button in the video controls must be enabled. See the Video Player controls lesson for more info.